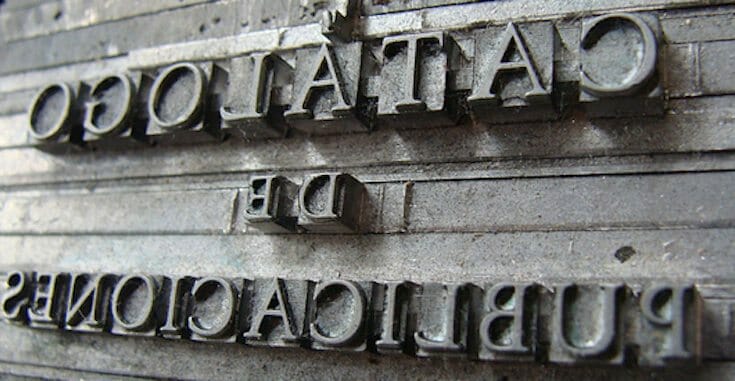
Back in the bad old days, everyone was a specialist. If you wanted to get type set, you went to a typesetter, and when you wanted to print a book you had to actually go to the book printer. Although it seems like things would have been more difficult to accomplish, in some ways they were easier.
It was easier because the system of production was clear, structured, hierarchical. Each specialty was insulated from the others by unions, tradition, the long apprenticeship it took to learn many of the trades involved in book publishing, and by language.
Every specialty had its own terms and expressions. Some of these had been in the trades for hundreds of years in one form or another. And while these specialized languages allowed trained professionals to talk to each other in a much more efficient way, it also served another purpose.
Outsiders couldn’t understand it. This made it possible to make what you were doing inside the walled garden of your own specialty even more mysterious and intimidating. That is, you could charge more because nobody had a clue what you were doing. And when things got tough with a client, you could always fall back on the specialists’ own specialty: you could “dazzle them with bullshit.”
Every specialty had its own terms and expressions.
Because of this phenomenon I’ve often counseled clients to play dumb when they talk to specialists, no matter how much they know. If you simply insist on the outcomes you want, and that you’re willing to pay for, you can stay out of the morass the specialist intends to trap you in with his (to you) mysterious mumbo-jumbo.
“Oh, yes, well in that case we’ll definitely have to order in more em quads to h&j your book to full line-length specifications. Could be costly, although half point leads are down in the summer, those em quads could cost a bundle. You sure you want to make that change?”
“We could make your cover more like the red you wanted, but the color densitometers are throwing off non-stop out-of-gamut warnings and I wouldn’t want to see your gamma get all out of whack, let’s say we just go with it the way it is?”
The other way to cure this problem, of course, is to actually know what people are talking about when they’re using the specialized language of books.
This is particularly useful when you’re doing book layout, where the arcane language of typography has twisted tongues and addled minds for hundreds of years.
Against this tide of obfuscation, I thought we could hoist a flag of comprehension.
Here, then, are the top terms you need to understand if you want to carry on a conversation with a book design professional about the design and layout of your book.
Use them wisely.
The Language of the Book
Ascender/descender—Descenders are parts of letters that extend below the baseline as in the “tail” of the letters “y” “g” or “p” while ascenders are the parts of letters that rise above the height of lower case letters, like the upward-extending parts of the “l” “h” or “t”.
Baseline—The imaginary line on which type, not including the bits that go below the line, like the tail of the lower-case “g” or “p”.
Bleed—When an image or type is intended to run off the edge of the printed page, it is said to “bleed.” Printers have their own specifications for how far the image has to extend past the edge of the paper to allow enough room for manufacturing variances. In offset printing it is standard to allow one-eighth inch for bleed. Some digital printers, due to the looser manufacturing standards of their equipment, require one-quarter of an inch for bleed.
Blind folio—A page number that is assigned to a page but not printed on the page.
Book block—The complete interior of a book after the individual signatures have been printed fooled and gathered together and before being covered with a paper cover or hardcover case.
Bulking—The measurement of paper thickness expressed as how many pages it takes to equal one inch, as in “360 ppi” or 360 pages per inch. Lower ppi will create a thicker book, a higher ppi, a thinner one.
Bullet—A typographic character used to bring emphasis to items, often in a list, and therefore called a bullet list.
Casebound—Hardcover books are created by manufacturing a case from binders board and a covering such as cloth, leather or paper, then covering the book block with the case. In the bindery this is known as “casing in” and results in a casebound book.
CMYK, RGB—Different ways of representing color, CMYK is used in printing and creates colors through a combination of cyan, magenta, yellow and black inks. RGB is used for screen displays and creates colors through a combination of red, green and blue pixels. Materials prepared for printing usually need to be in the CMYK color space.
Colophon—A notice, usually at the end of a book, that credits the design, typography and production of the book.
Crop marks—Lines on artwork, either digital or mechanical, intended to show where the reproductions should be cut to achieve the final trim size.
Double truck—An image in a book or magazine that extends over two pages and across the gutter.
DPI—The amount of information contained within an image file is expressed as dots per inch. Screen images are usually displayed at 72 DPI on monitors, but printers typically require images of 300 DPI to produce acceptable results.
Folio—This is what we call page numbers in books. Folio is a term derived from early printing. Thus, page numbers at the bottom of a page are referred to as drop folios and pages without page numbers might be referred to as using blind folios (you can’t see them but they are implied.) After adding page numbers, we might say the pages are foliated.
Grayscale—The color space for black and white graphic images. For book interiors intended to be printed only in black, all graphics should be grayscale.
Gutter, margin—Margins are the blank spaces around the type area on a book page, but the inside margin has the special name gutter and it is always the margin on the bound edge of the book page. When you’re looking at a book page spread you’ll have two gutters together, doubling the apparent space. Keep that in mind when laying out your book page.
Imposition—Not something being forced on you. Books are usually printed on large sheets of paper which are subsequently folded several times and then assembled and trimmed on the outside edges. The arrangement of pages on the large sheets is the imposition, and before computers it was the responsibility of specialists who could figure out which page should go where.
Justification—Describes how the left and right edges of a block of type are arranged by the typesetter. Flush left type is even on the left margin and ragged on the right edge as a standard amount of space is used between each word and lines are allowed to end wherever, creating a “ragged” appearance. Flush right is the opposite. Justified typesetting varies the amount of space between words (and sometimes between letters) to create straight margins on both the left and right sides of a block of type.
Kerning—The adjustment of the inter-letter spacing of in typesetting to account for the shapes of the letters and to make the type appear to be uniformly spaced.
Leading—Quite simply the measurement of space between the lines of type, usually measured from one baseline to the next.
Ligature—Another carryover from the work of scribes before typesetting was invented, ligatures join two letters together where the forms of the letters would otherwise create an awkward inter-letter spacing problem. Frequently used for “fi” “fl” and similar combinations.
Page, leaf, spread—Different ways of describing the book page. A page is one side of a leaf of paper. The basic unit of design in printed books is the spread, or two facing pages as you see them when a book is opened flat. In ebooks, the spread has become obsolete, since ereaders simply create pages on the fly and there is no “open book” as with a printed book.
Pagination—Dividing a book into pages, and the assigning of page numbers (folios) to the pages in a specific style of numbering.
Pica, point—The printer’s standard unit of measure for typography and layout. The pica is now standardized as one-sixth of an inch. There are 12 points in every pica. Used most commonly to denote type size and leading, as in “12 point Minion on 15 points leading.”
Running head/running feet—Page elements that show the reader where they are in the book, running heads (at the top of the page) or running feet (at the bottom of the page) can include the book title, author name, part title, chapter title or subject headings to provide navigational help to the reader.
Safe area—Designated by a book printer, the area that is far enough away from the trim or gutter edges to be considered “safe” within the tolerances of the printer’s manufacturing equipment.
Serif, sans serif—Typefaces that evolved from calligraphic originals still show the influence of scribes writing with square-nibbled pens in the little serifs, or finishing strokes of the letters. Type designs without these flourishes are sans serif, (from the French).
Signature—Books are printed in multiples of 8, 16 or 32 pages on large sheets of paper. Once the paper has been printed and folded to the size of the book it becomes a signature. If the sheets hold 16 pages, we refer to the book as being printed in “16-page signatures.”
Tracking—An adjustment offered by typesetting programs that adjusts the overall spacing between letters. Looser tracking is often used for smaller type or type set in small caps. Tighter tracking is common in larger type sizes like those used for headlines.
Trim size—Books are printed on large sheets which are then folded into signatures. The signatures are gathered to create the book block which is then trimmed on the top, bottom and the opening side. Thus the final size of the book is called the trim size. Although a book can be produced in any size, printers and trade practice mostly use standard trim sizes for economy.
Widow/orphan—The first or last line of a paragraph left at the bottom or stranded at the top of a page, usually considered an aesthetic defect in better typography.
Photo by badbrain


