I just got finished taping a video interview with Joanna Penn of The Creative Penn blog. In it Joanna revealed the winner of the poll she conducted on her blog last week to pick the final design for the cover of her upcoming thriller, Pentecost.
When she conducted the poll I blogged about the way she involved her community in the decision-making process, and got a tremendous response with over 500 votes cast for the four covers. In the interview we talked about the process of designing book covers and how, through progressive steps, we come to a final design.
The process is very collaborative. I rely on the authors and publishers I work with to indicate the direction they feel is most appropriate for the book.
If you read that article, or the one on Joanna’s blog, you might want to check out the video. It runs 12 minutes and Joanna has put some of the other cover ideas that didn’t make it as far as the poll into the video. Here’s a link:
Book Cover Design: The Process Explained
Peeling the Onion
Several people commented about the backgound image and how atmospheric the cover is. Creating these effects is an interesting but sometimes laborious process. They don’t just happen by themselves.
I’m going to show you how this cover image was created from bits and pieces of artwork, and how it came together into the image you see on the finished cover.
This artwork was created in Adobe Photoshop, part of Adobe’s Creative Suite. It’s the best image-manipulation software I’ve ever worked with. It seems you can do just about anything in Photoshop if you have the patience.
This artwork was created out of 11 separate layers. Here’s how it was built, starting at the bottom.
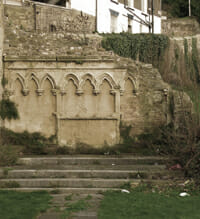
The first piece of art that forms the basis of the cover is a photograph I collected from Flickr using its Creative Commons licensing search. This allows us to find artwork that has been licensed for commercial use as long as we credit the originator.
I’m not sure what stopped me about this photo, but I really liked the archways in the old ruined wall, and set it aside for later use. This image became the basis for many designs.
I then added gradients of black to both the top and bottom of the image, to create more atmosphere and a central focus to the cover:
When this gradient wasn’t quite enough, I later added another lighter gray gradient to further deepen the shadow effect at the top of the image:
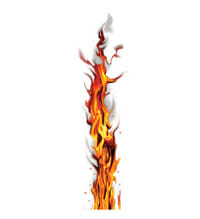
Now that I had the atmospheric look I wanted, it was time to add the “column of fire.” This element came from a section near the end of the book. It’s pretty exciting and I don’t want to ruin the story for you, so that’s all I’m going to say.
I hired a wonderful Photoshop artist, Alodia Bautista, to create the detailed and intricate artwork that I would use to create the effect I was looking for. Here’s the main column:
Alodia then created 5 more layers, each with bits of flame, smoke and sparks. These layers were used to wrap around, behind and in front of the title typography, creating an integration of art and type. This is what all 5 layers together look like:

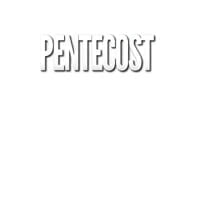
Next the title went in. Having the type on its own layer allowed me to experiment with different effects by shuffling the type between the various detail layers of flames.
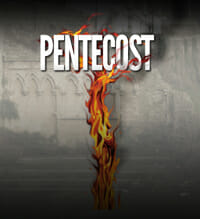
Using Photoshop’s powerful blending modes, each layer could be carefully combined with layers beneath it. The complete, composite image bring it all together:
The resulting image was flattened and moved to Adobe InDesign for final layout. Here I added the rest of the type to the bottom of the cover, and cropped the image to fit the book’s trim size. Here’s the final result:
Part of the fun of doing these covers is working with clients and friends like Joanna. She is a great client because she imposed no restrictions at the beginning of the project, but was able to emphatically say what she liked, and what she didn’t like. This gives the designer the guidance needed for effective collaboration. I think this cover shows the results of that process.
I can’t wait to do the interior.


